What is construction workflow management?
A construction workflow outlines the key steps to complete a project efficiently and safely from planning to completion. Examples include:
Residential workflow: Designing, permitting, building and inspecting homes.
Commercial workflow: Planning and constructing offices, malls or other business spaces with a focus on regulations and coordination.
Infrastructure workflow: Building public works like roads and bridges emphasizing surveys, compliance and durability.
Effective construction workflow management reduces delays, cuts costs and ensures smooth communication among all stakeholders.
Why use a construction workflow management template?
Construction projects often face challenges like missed deadlines, resource mismanagement and miscommunication. A construction workflow management template is your key to tackling these issues and keeping your project on track. Use a workflow management template to:
Keep teams aligned: Provide everyone on the team with a clear view of responsibilities, due dates and progress. This ensures everyone is working towards the same goals.
Streamline communication: Centralize project information in one location, reducing the need for constant updates and preventing miscommunication.
Track progress in real-time: With built-in task tracking, stay updated on the status of each task and identify potential bottlenecks early on.
Ensure accountability: Assign tasks to specific team members and set due dates to promote ownership and timely completion.
Improve resource management: Plan resources effectively by knowing exactly what tasks need to be completed at each project stage.
Simplify documentation: Keep a detailed record of all stages, approvals and changes made throughout the project. This makes it easier to reference and manage documentation.
When to use the construction workflow management template
Here are some key moments when the template proves most valuable:
During initial planning: Use the template to outline all key tasks and milestones. Define the project stages, set due dates and allocate resources to ensure smooth execution.
Before project execution: Once all planning tasks are complete, activate the workflow template to begin organizing and managing the tasks required for project execution. This ensures that every stage is fully completed before moving forward.
When transitioning between stages: Use the template as a checklist to verify that all tasks for a given stage are completed before moving to the next one. This helps avoid oversights and delays.
Throughout project monitoring: As the project progresses, use the template to monitor ongoing tasks, track deadlines and adjust for any unforeseen changes or challenges.
At project closeout: Once the construction is completed, use the template to ensure all closeout tasks are completed. For example, handing over to the client or archiving project records.
How to use the template
Using the construction workflow management template is straightforward. Here’s how to get started:
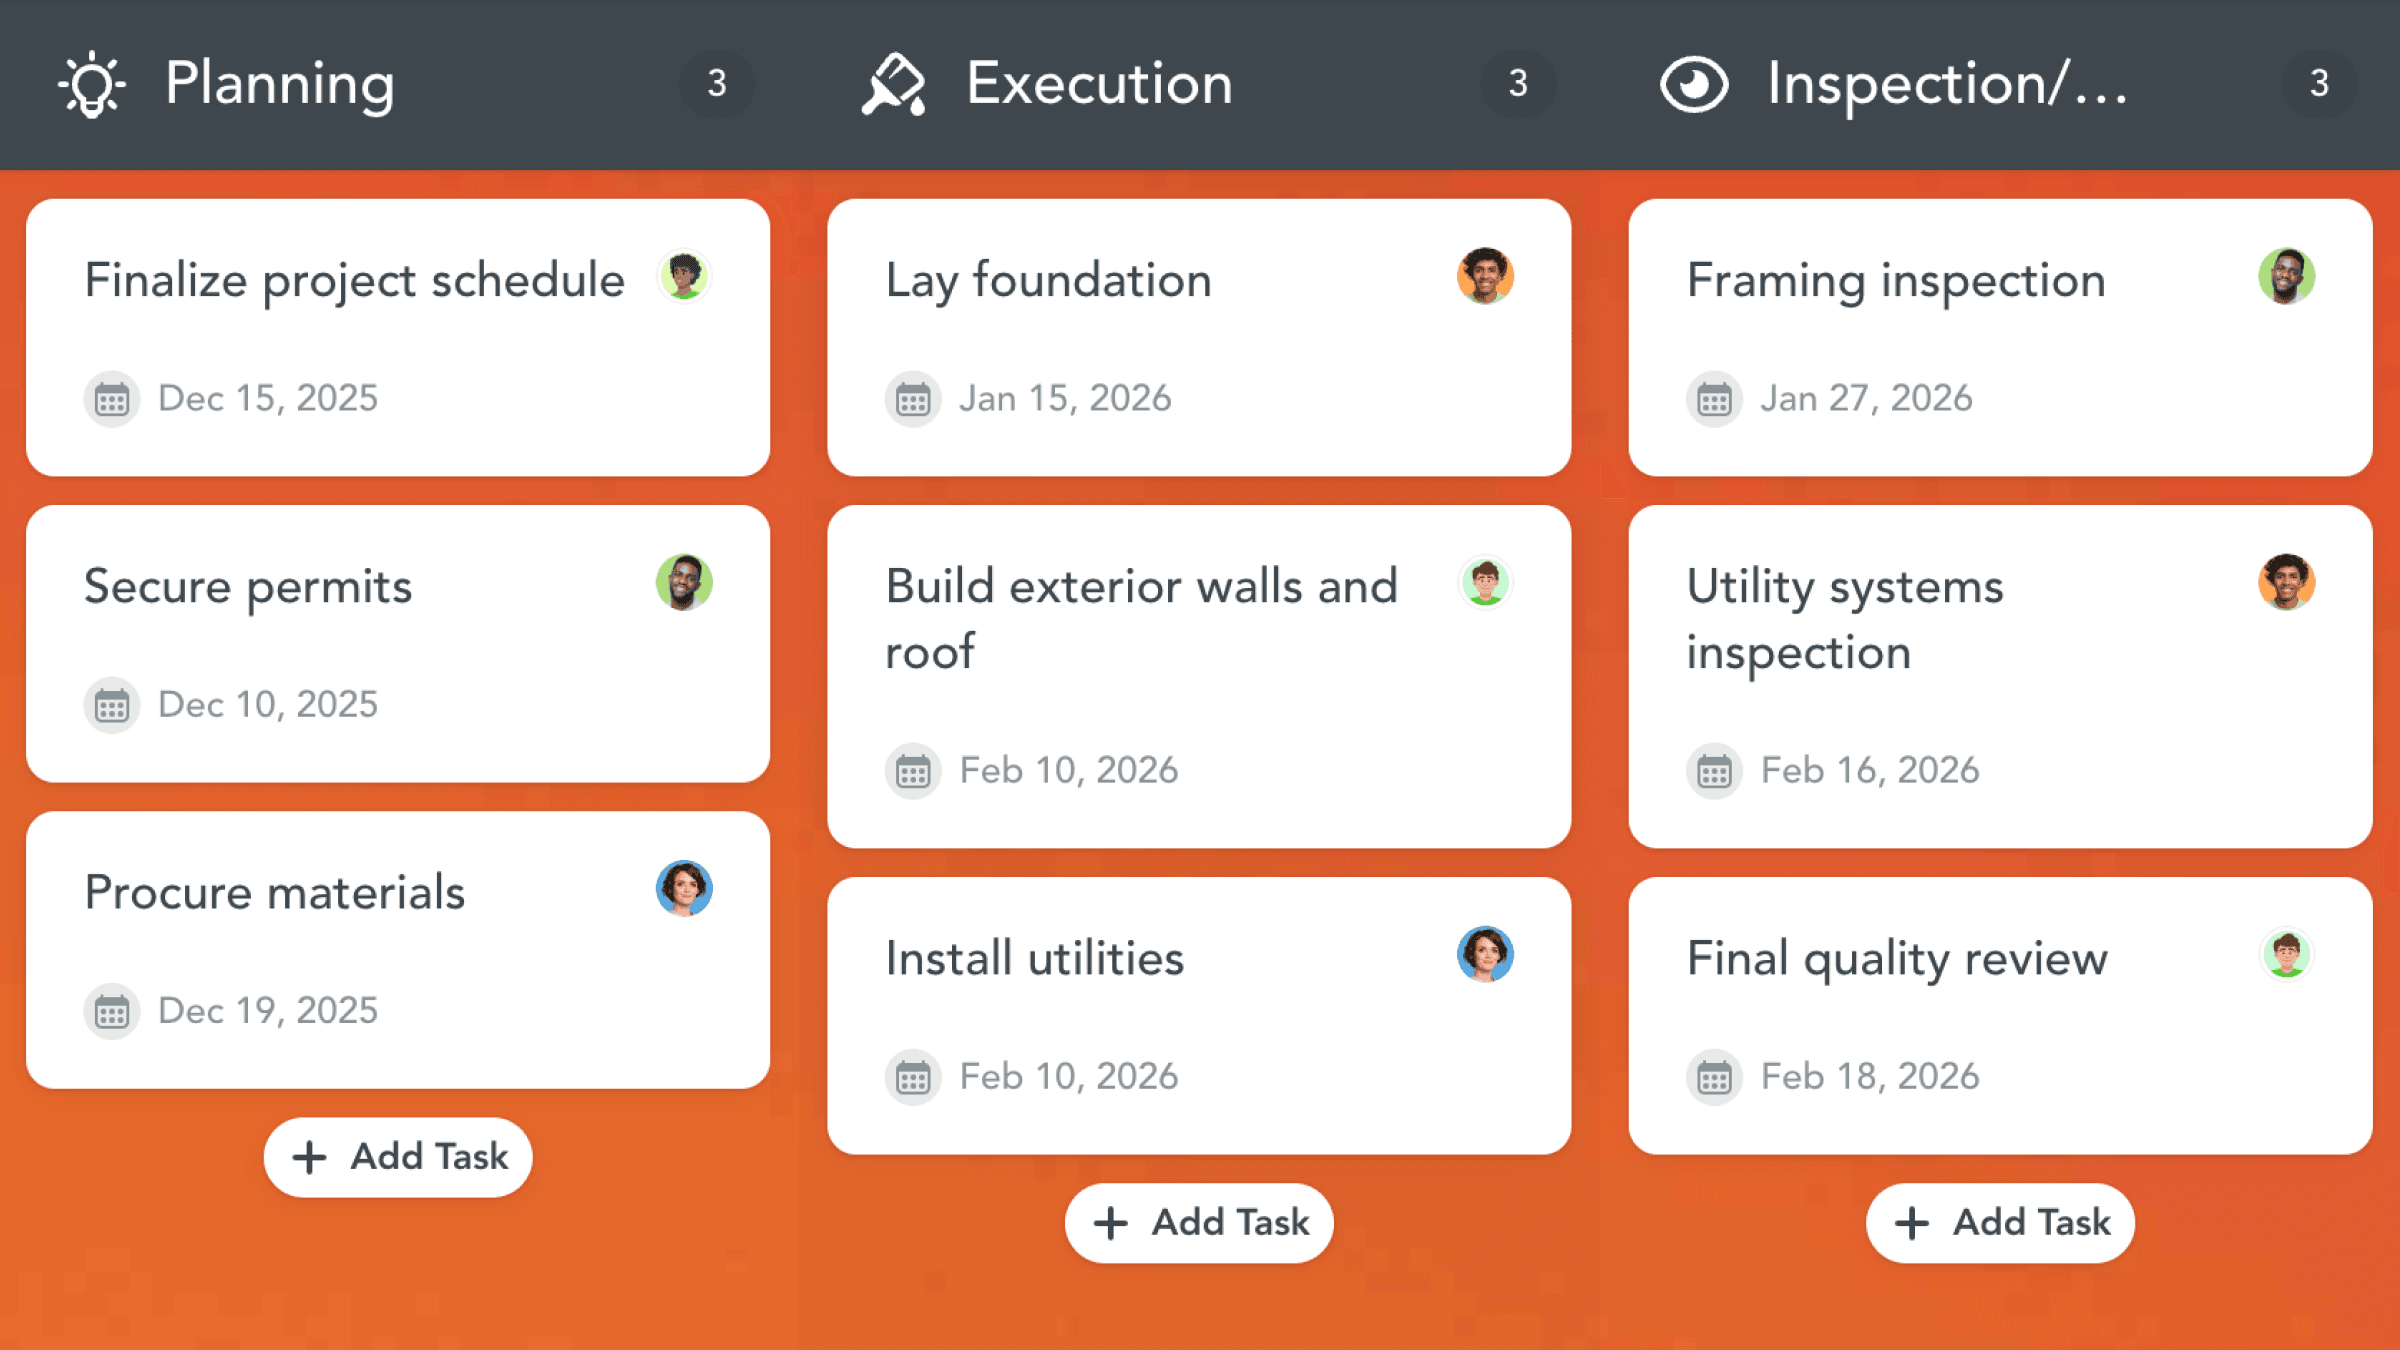
Step one: Break down tasks for each stage
For each stage, list the specific tasks that need to be completed. We’ve included some tasks for inspiration, such as securing permits, laying foundations and framing inspections. Feel free to customize these tasks or click the “+ Add Task” button at the bottom of the relevant section to include any new tasks.
Step two: Include checklist items
Customize, remove or add checklist items within each task to outline the specific actions needed. For example, under "finalize project schedule," you’ll find “identify milestones”, “assign task durations” and “review dependencies”. These checklists ensure all critical steps are accounted for.
Step two: Assign responsibilities
Assign each task to the relevant team member and set realistic due dates. This ensures accountability and helps keep the team focused on their individual responsibilities.
Step three: Track progress and adjust
As the project progresses, mark tasks as completed and update the status of ongoing tasks. Use the template to identify any delays or bottlenecks early on and adjust resources or timelines accordingly.
Step four: Review at each stage transition
Before moving to the next stage, review the template to check all tasks are completed. This allows for a smooth transition between project phases.